


Elevate Your Home Ambiance with a Water Vapor Electric Fireplace
Understanding Water Vapor Electric Fireplaces
What is a Water Vapor Electric Fireplace?
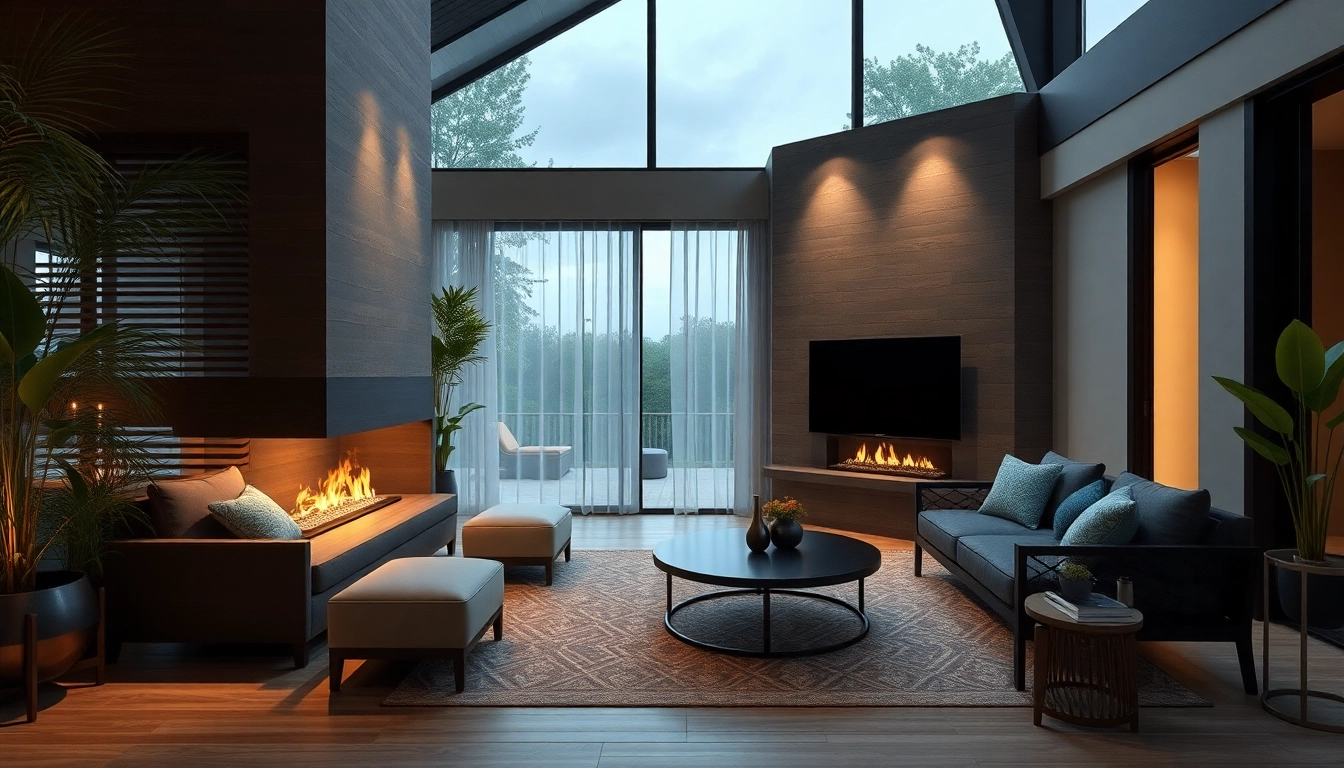
A water vapor electric fireplace offers an innovative solution to create the aesthetic allure of traditional fireplaces without the accompanying heat. These devices utilize advanced technology to produce a realistic flame effect using water vapor, providing both visual appeal and a unique ambiance within your home. Unlike conventional fireplaces, these electric models do not rely on wood, gas, or burning fuels, making them an environmentally conscious choice that aligns with modern concerns about air quality and energy efficiency.
Key Features and Benefits
Water vapor electric fireplaces come packed with features that distinguish them as desirable fixtures for contemporary homes. Here are some of the key benefits:
- Realistic Flame Effects: Employing ultrasonic technology, these fireplaces create a 3D illusion of flames that flicker and dance naturally, mimicking the appearance of a real fire.
- Safety: With cool-to-the-touch vapor flames, these fireplaces are safer for homes with children and pets, eliminating risks associated with traditional flames.
- Energy Efficiency: Many models operate with minimal energy consumption, making them financially beneficial for homeowners looking to lower utility bills.
- Year-Round Ambience: These fireplaces can be enjoyed even in warmer months, setting a cozy atmosphere without generating heat.
- No Venting Required: Unlike gas or wood-burning fireplaces, water vapor models do not require a flue or chimney, simplifying installation.
Comparative Analysis with Traditional Fireplaces
When evaluating the advantages of water vapor electric fireplaces against traditional options, several factors emerge. Traditional fireplaces often require complicated installations and produce significant heat, which can lead to energy inefficiencies. Furthermore, they emit smoke and pollutants unless they are strictly maintained or equipped with sophisticated ventilation systems.
In contrast, water vapor fireplaces provide a cleaner burn, as they do not consume combustible fuels. Additionally, they maximize design flexibility and can seamlessly integrate into various decor themes without the need for extensive alterations. This combination of benefits often makes water vapor electric fireplaces not only a stylish alternative but also a more practical choice for today’s environmentally aware consumers.
Installation and Setup
Required Tools and Specifications
Installing a water vapor electric fireplace is relatively straightforward, but it requires specific tools and an understanding of space requirements. Here’s a list of tools and prerequisites you’ll need:
- Tools:
- Power drill
- Screwdrivers
- Measuring tape
- Level
- Pliers
- Specifications:
- Access to an electrical outlet
- Space dimensions for the fireplace unit
- Water supply line (optional for some models)
- Drainage capability if necessary
Step-by-Step Installation Guide
Follow these steps to ensure a successful installation of your water vapor electric fireplace:
- Choose the Location: Determine where you want to place your fireplace, considering nearby outlets and water supply if needed.
- Prepare the Area: Clear the space and ensure that it meets the manufacturer’s specifications for the model you chose.
- Install the Unit: Depending on your model, you may need to mount the fireplace on a wall or place it inside a designated cabinet or mantel. Ensure it is level and secure using screws and brackets provided.
- Connect Power and Water: Plug in the fireplace to a nearby appropriate outlet. If your model requires water connections for vapor production, connect the water line according to the manufacturer’s instructions.
- Test the System: Once installed, turn on the unit to test the functionality of the flame effects and ensure everything operates smoothly.
Maintenance Tips for Longevity
To maximize the life and performance of your water vapor electric fireplace, consider the following maintenance tips:
- Regular Cleaning: Periodically wipe down the unit with a damp cloth to prevent dust buildup. Avoid using harsh chemicals that can damage the finish.
- Check Water Levels: For models with a water reservoir, maintain adequate water levels to ensure optimal vapor production.
- Inspect Connections: Regularly check electrical and water connections for any signs of wear or leakage and address issues promptly.
- Follow Manufacturer Guidelines: Adhere to the specific maintenance guidelines provided by your unit’s manufacturer for optimal performance.
Design Options and Customization
Popular Styles and Models
Water vapor electric fireplaces come in a variety of styles to complement any home decor. Popular options include:
- Wall-Mounted Units: Great for modern spaces, these units can be hung at varying heights to fit your aesthetic preferences.
- Freestanding Models: These versatile fireplaces can be moved easily and are perfect for those who want a temporary setup.
- Built-in Fixtures: Ideal for new constructions or renovations, built-in options can be customized to fit seamlessly into your home’s architecture.
- Replacement Inserts: For existing fireplace structures, inserts can breathe new life into outdated models while providing a contemporary vapor flame effect.
Customization Possibilities
Many brands offer customization features that allow you to personalize your fireplace to fit your lifestyle and preferences. Options can include:
- Choice of flame colors: Some models offer multi-colored flames, enhancing the visual spectacle.
- Sound effects: To mimic the crackling of real fire, choose models that have integrated sound functions.
- Remote control: For convenience, opt for fireplaces that come with remote control functionality for easy operation from a distance.
Decor Inspiration for Your Space
Incorporating a water vapor electric fireplace into your home can enhance the overall ambiance. Here are some decor ideas to maximize its impact:
- Create a Focal Point: Position the fireplace in a central location to draw attention and provide a gathering spot.
- Accent with Surrounding Decor: Use complementary furnishings such as cozy chairs, decorative mantels, or shelves to create a warm, inviting atmosphere.
- Color Coordination: Match the color scheme of your fireplace with the surrounding decor to create a cohesive look.
Safety and Efficiency Considerations
Safe Use Around Children and Pets
One of the standout features of water vapor electric fireplaces is their safety profile. Designed to reduce risks associated with open flames, here are suggestions for safe use:
- Ensure that children and pets are supervised around any electrical units.
- Teach children about the fireplace features and the importance of not playing with control mechanisms.
- Make sure the unit is stable and securely mounted to prevent tipping.
Energy Efficiency and Environmental Impact
Water vapor electric fireplaces are celebrated for their eco-friendly design. They do not rely on fossil fuels, leading to zero harmful emissions or pollutants. They provide stunning visuals while maintaining energy efficiency. Most models will use significantly less energy than traditional fireplaces, which can result in reduced utility bills and a lesser carbon footprint for homeowners. Strategic installation in well-insulated spaces can further enhance these efficiencies.
Common Safety Questions Answered
Customers often have queries regarding the safety and maintenance of water vapor fireplaces. Here are some common questions:
- Do they require a chimney? No, water vapor fireplaces do not produce harmful emissions and thus require no chimney or venting system.
- Can the unit overheat? Most modern water vapor fireplaces have built-in safety features that prevent overheating and ensure safe operation.
- Is it safe to leave the fireplace on overnight? While many models can safely operate for extended periods, always consult the manufacturer’s guidelines for their specific recommendations.
Customer Feedback and Reviews
What Users Are Saying
User experiences with water vapor electric fireplaces have generally been positive, with many praising their realistic imitation of fire and ease of installation. Customers often express satisfaction with the mood set within their space, highlighting the versatility these units bring.
Pros and Cons from Real Experiences
Based on customer reviews, here are some noted pros and cons:
Pros:
- Stunning flame effects that provide ambiance.
- Significantly safer than traditional fireplaces.
- Flexible installation options and minimal maintenance required.
- Ideal for year-round use without heat concerns.
Cons:
- Some customers note a limited heat output.
- Initial investment can be higher than traditional electric fireplaces.
- The necessity for a water source may limit placement options.
Making an Informed Purchase Decision
When considering a water vapor electric fireplace, it’s important to evaluate both your needs and the specific features of available models. Assess your space’s size, desired aesthetic, and any additional features like customizable flame colors or sound effects. It is also wise to read customer feedback and compare offerings from multiple manufacturers to ensure you select the right fireplace that meets your expectations.

Find the Best B&Q Kitchen Fitter Near Me for Your Dream Kitchen Makeover
Understanding the Role of a B&Q Kitchen Fitter
When considering a kitchen renovation, the importance of a qualified kitchen fitter cannot be overstated. A skilled B&Q kitchen fitter can transform your culinary space while ensuring every detail aligns with your vision. This article aims to explore the extensive role of these professionals and provide actionable insights for those searching for a B&Q kitchen fitter near me.
What Does a Kitchen Fitter Do?
A kitchen fitter specializes in the installation and configuration of kitchen units, appliances, and fixtures. Their primary responsibilities include:
- Measurement and Planning: Taking accurate measurements of the kitchen space to ensure a perfect fit for cabinets, countertops, and appliances.
- Installation: Assembling and installing cabinets, worktops, sinks, and other kitchen elements.
- Plumbing and Electrical Work: Coordinating with plumbers and electricians to ensure appliances are installed correctly and safely.
- Finishing Touches: Applying sealant, adjusting fixtures, and ensuring everything functions perfectly.
Benefits of Hiring a Professional Kitchen Fitter
The decision to hire a professional kitchen fitter comes with numerous benefits:
- Expertise: Kitchen fitters possess specialized knowledge and skills that ensure every aspect of the installation is completed correctly.
- Time-Saving: Professionals can complete installations in less time than an inexperienced person, allowing you to enjoy your new kitchen sooner.
- Quality Assurance: A professional will adhere to industry standards, ensuring a high-quality finish that enhances the value of your home.
- Problem-Solving: Experienced fitters can anticipate potential challenges and resolve issues before they become costly problems.
Key Skills and Qualifications to Look For
When hiring a kitchen fitter, it’s essential to look for certain qualifications and skills:
- Certifications: Look for fitters with relevant certifications in plumbing, electrics, and kitchen installation.
- Experience: Choose a fitter with a proven track record and positive customer testimonials.
- Detail-Oriented: A great kitchen fitter pays attention to detail, ensuring every element aligns with your design plan.
- Communication Skills: Effective communication is vital to ensure that your ideas and vision are understood and brought to fruition.
How to Locate a B&Q Kitchen Fitter Near You
Utilizing Local Listings and Map Services
Local directories like Google Maps, Yelp, and Yellow Pages can be excellent resources for finding kitchen fitters in your area. By simply searching “B&Q kitchen fitter near me,” you can find profiles that include reviews, ratings, and contact information. Look for listings that have solid customer feedback and showcase their recent work.
Online Reviews and Customer Feedback
Online reviews on platforms like Trustpilot or local forums can provide valuable insights into the reputation of different kitchen fitters. Pay attention to comments regarding:
- Workmanship quality
- Communication during the project
- Adherence to deadlines
- Overall customer satisfaction
Asking for Recommendations from Friends and Family
Personal recommendations can often lead you to reliable kitchen fitters. Reach out to friends, family, or neighbors who have undergone similar renovations. Their experiences can guide you toward skilled providers and save you time in your selection process.
Preparing for Your Kitchen Fitting Appointment
Essential Information to Provide Your Fitter
Preparation is key to a successful kitchen installation. Make sure to provide your kitchen fitter with:
- Design sketches or inspiration images to convey your vision
- Measurements of your kitchen and existing layouts
- Your budget constraints and any specific requests
- Details about any existing plumbing or electrical configurations that could affect installation
Measuring Your Kitchen Space Accurately
Accurate measurements are crucial for a seamless installation. If you’re measuring yourself:
- Measure the length and width of walls
- Take note of window and door placements
- Record the heights of various elements
Providing these precise measurements will help your kitchen fitter create a plan that maximizes space and functionality.
Discussing Your Vision and Design Preferences
Effective communication regarding your vision is vital. Discuss your design preferences, including:
- Cabinet styles (modern, traditional, etc.)
- Countertop materials (granite, quartz, etc.)
- Color schemes and aesthetics
Clear discussions here will ensure that the finished product aligns with your expectations.
Cost Factors When Hiring a B&Q Kitchen Fitter
Understanding the Pricing Structure
The cost of hiring a kitchen fitter can vary significantly based on many factors:
- Complexity of the Installation: More complex installations that involve extensive plumbing or electrical work can increase costs.
- Experience of the Fitter: More experienced professionals typically charge higher rates due to their expertise and reputation.
- Location: Prices can also vary by region; urban areas may have higher costs than rural areas.
Hidden Costs You Might Encounter
When budgeting for a kitchen installation, be aware of potential hidden costs:
- Additional Materials: Costs for materials that may not have been included in the initial quote.
- Unexpected Repairs: If existing plumbing or electrical work needs to be updated.
- Design Changes: Upgrades or design changes made after getting quotes can affect the final price.
Budgeting Tips for Your Kitchen Installation
To manage your kitchen renovation costs effectively:
- Set a clear budget and stick to it
- Prioritize your must-have features before making decisions on optional ones
- Get multiple quotes and compare them carefully before making a decision
Ensuring a Successful Kitchen Installation
Final Checks and Quality Assurance
Before your kitchen fitter leaves, conduct a thorough check of the installation. Ensure that:
- All units are level and secured properly
- Appliances function correctly
- Cabinet doors and drawers open and close smoothly
Any issues should be addressed immediately to prevent further complications.
Post-Installation Maintenance Tips
Regular maintenance helps keep your kitchen looking new and functioning well:
- Follow the manufacturer’s guidelines for appliance care
- Regularly clean and inspect fittings and fixtures
- Address any signs of wear promptly to avoid larger problems in the future
Establishing a Good Relationship with Your Fitter
Building a good rapport with your kitchen fitter can lead to a more successful project:
- Communicate openly about expectations and preferences
- Provide feedback during the installation process
- Trust their expertise and be open to their suggestions
Enhance Your Workspace with a Stunning Mooswand Büro: Benefits and Ideas
What is a Mooswand Büro?
Definition and Key Features
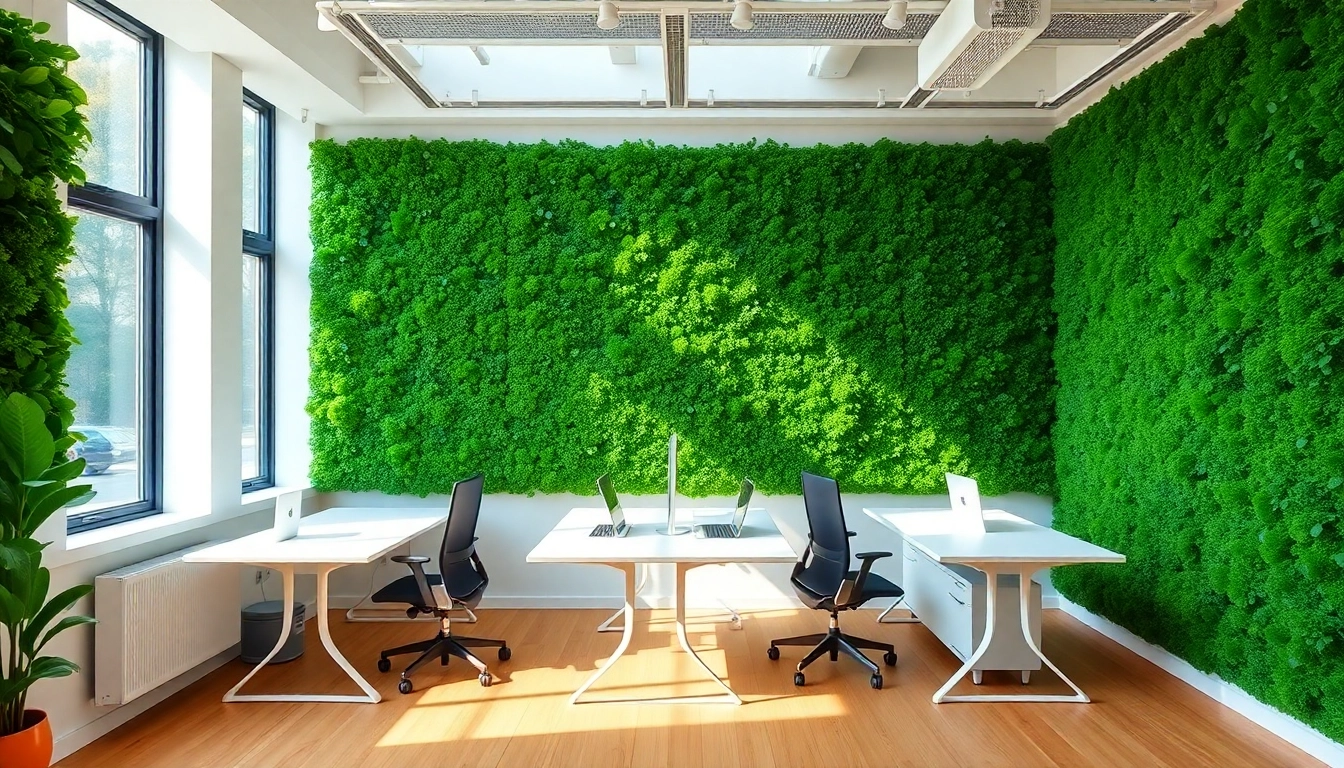
A Mooswand Büro or moss wall is an innovative biophilic design element that integrates preserved moss into workspaces, promoting natural aesthetics and enhancing indoor environments. It consists of various types of moss, often moss species like reindeer moss, which are preserved and stabilized to maintain their vibrant colors and textures. These walls not only serve as striking focal points in any office space but also provide numerous benefits that extend beyond mere visual appeal.
The key features of a Mooswand Büro include:
- Low Maintenance: Unlike traditional plants, preserved moss requires minimal upkeep and does not need watering or sunlight.
- Sustainable Materials: Typically made from sustainably sourced materials, moss walls are eco-friendly options for sustainable design.
- Acoustic Benefits: Moss has sound-absorbing properties, helping to reduce noise levels in busy workspaces.
- Variety of Textures and Colors: With a range of moss types available, each wall can be uniquely designed to match a company’s branding or desired aesthetic.
Benefits of Using a Mooswand Büro
Implementing a Mooswand Büro in the workplace brings with it a plethora of benefits, from enhancing the work atmosphere to improving employee productivity. Below are some compelling advantages:
- Improved Mental Health: Nature has a natural calming effect, helping to reduce stress and promote a sense of well-being.
- Increased Creativity: The presence of greenery can stimulate creative thinking and problem-solving skills.
- Enhanced Collaboration: A visually appealing environment encourages social interactions among employees.
Diverse Applications in Modern Workspaces
Mooswand Büros can be utilized in a variety of settings to accommodate different needs:
- Reception Areas: They create an inviting atmosphere for clients and visitors, making a memorable first impression.
- Meeting Rooms: Moss walls can energize brainstorming sessions and enhance the focus of participants.
- Breakout Spaces: These spaces benefit from a more relaxed vibe, helping employees recharge and unwind.
Benefits of Mooswand Büro in the Workplace
Improving Air Quality and Wellbeing
Research indicates that indoor plants can enhance air quality, lowering levels of pollutants and increasing oxygen levels. A Mooswand Büro can contribute significantly to these improvements. The moss helps to naturally filter air, absorbing toxins and releasing moisture into the environment, creating a healthier workspace for employees.
Enhancing Aesthetics and Décor
Visual appeal in the workplace plays a crucial role in employee morale and satisfaction. A Mooswand Büro introduces natural beauty that can soften stark office designs, adding warmth and character. The organic look of moss contrasts nicely with modern materials like glass and metal, creating a harmonious balance within the decor.
Boosting Productivity and Creativity
Studies have shown that exposure to nature can significantly improve cognitive function and tasks involving memory and attention. A workplace that incorporates a moss wall can foster better concentration and create an environment conducive to creativity. Employees with access to natural elements often report higher job satisfaction and are more inclined to stay engaged with their work.
Installation and Maintenance of Mooswand Büro
Choosing the Right Location
Placement of a Mooswand Büro is critical for maximizing its impact. Ideal locations include:
- Areas with High Foot Traffic: Such as hallways or reception areas to immediately draw attention.
- Meeting Rooms: Where teams gather frequently for collaborative sessions.
- Break Rooms: Spaces designed for relaxation benefit from a calming atmosphere.
Best Practices for Installation
To ensure a successful installation of a Mooswand Büro, consider the following best practices:
- Professional Assessment: Consult with installation experts to gauge wall stability and materials required.
- Proper Adhesives: Use adhesives specifically formulated for moss to prevent deterioration.
- Follow Manufacturer Guidelines: Adhere strictly to the installation instructions provided by moss wall suppliers.
Maintenance Tips for Longevity
While a Mooswand Büro requires less maintenance compared to living plants, regular care will help preserve its beauty:
- Dusting: Gently remove dust with a soft cloth or vacuum with a brush attachment to maintain its appearance.
- Humidity Levels: Maintain optimal humidity levels within the space to preserve the moss’s integrity.
- Avoid Direct Sunlight: Position the moss wall away from sunlit areas to prevent fading and drying.
Design Ideas for Your Mooswand Büro
Incorporating Technology with Nature
One innovative approach to integrating a Mooswand Büro is to combine it with technological elements. For instance, consider incorporating LED lighting that enhances the natural texture of the moss while providing illumination. Smart systems can also control air quality, ensuring the area’s environment remains pleasant and inviting.
Furniture Pairings for a Cohesive Look
To create a harmonious balance between a moss wall and surrounding furniture, choose natural textures and colors that complement the greenery. Wooden furniture pieces with organic finishes, soft earth tones, and neutral palettes work effectively to enhance the aesthetic appeal of the moss wall while promoting a cohesive workspace.
Color Schemes that Complement a Mooswand Büro
Incorporating a Mooswand Büro into your space presents an opportunity to experiment with creative color schemes. Earth tones, soft greens, and muted hues can evoke a sense of tranquility and connection to nature. Consider using variations of green in accent walls, or furniture to contrast and highlight the vibrant greens of the moss.
Case Studies: Successful Mooswand Büro Implementations
Company A: Increased Productivity Metrics
Company A, a tech startup, integrated a Mooswand Büro into their workspace, resulting in a surprising boost in productivity. After installation, the company conducted a survey revealing a 30% increase in job satisfaction and a marked improvement in employees’ focus during meetings. They attributed these positive results to the more engaging aesthetics and the calming effects of integrating greenery.
Company B: Employee Feedback and Satisfaction
A marketing firm, referred to as Company B, installed a moss wall in their main lobby. Feedback from employees highlighted how the moss wall made the environment feel more welcoming and less sterile compared to previous setups. The company reported a decrease in sick days taken, enhancing overall employee wellbeing and satisfaction levels over six months post-installation.
Lessons Learned from Successful Projects
The success stories from Company A and Company B emphasize the importance of thoughtful placement and design. Proper assessment of workspace aesthetics and employee preferences before installation contributed significantly to the positive outcomes experienced. Engaging employees in the planning process can further enhance satisfaction and foster a sense of ownership over the new design elements in the office.

Stylish Hotel Room Wardrobes: Elevate Guest Experience with Sophisticated Storage Solutions
Understanding Hotel Room Wardrobes
Definition and Importance of Hotel Wardrobes
Hotel room wardrobes play a pivotal role in the design and functionality of guest rooms in hotels. These elements are not merely a space for storing clothes; they are integral to creating a seamless guest experience. In a world where guests expect comfort and convenience, the wardrobe becomes an essential aspect of their stay. The right Hotel Room Wardrobes can enhance the overall atmosphere of a room, contributing to satisfaction and comfort by providing ample space to organize personal belongings efficiently.
Key Features of Effective Wardrobe Designs
Effective hotel wardrobe designs prioritize both functionality and aesthetics. Key features include:
- Storage Capacity: Ample space for hanging clothes, shelves for folded items, and compartments for shoes and accessories are fundamental.
- Accessibility: Wardrobes should be easy to access, with well-organized spaces allowing guests to retrieve their items with minimal fuss.
- Durability: As these furnishings are subject to frequent use, they must be constructed from robust materials that withstand wear and tear.
- Aesthetic Appeal: The design should harmonize with the overall decor of the room, enhancing its visual allure while maintaining a sense of luxury.
Different Types of Hotel Room Wardrobes
Hotel room wardrobes come in various styles tailored to different room types and guest needs. Some common types include:
- Walk-in Wardrobes: These spacious options allow guests to step inside for an organized dressing area.
- Built-in Wardrobes: Offering a seamless look, they maximize space while providing personalized storage solutions.
- Freestanding Wardrobes: These can be moved or replaced easily and often serve as a design statement in the room.
- Open Wardrobes: Increasingly popular, these eliminate doors for a modern feel, making it easy for guests to view their belongings at a glance.
Choosing the Right Hotel Room Wardrobes
Factors to Consider When Selecting Wardrobes
Selecting the right hotel room wardrobe involves a comprehensive consideration of several factors. These include overall room style, guest demographics, and functionality.
- Guest Profile: Understanding the needs of different guest types (business travelers, families, etc.) helps in crafting a wardrobe that meets specific requirements.
- Room Size: Wardrobes must be proportionate to the size of the room; oversized wardrobes in small spaces can create clutter.
- Ease of Maintenance: Materials and designs that require minimal upkeep are critical, ensuring that wardrobes remain pristine over time.
Size and Spatial Considerations
When it comes to hotel room wardrobes, size and spatial considerations are paramount. Proper measurements ensure that wardrobes fit the allocated space while allowing room for movement. Furthermore, when designing wardrobes, it’s essential to factor in:
- Door Swing: The direction in which wardrobe doors open should not obstruct pathways or cause inconveniences.
- Visual Proportions: Maintaining a visual balance with existing furniture fosters harmony in the room.
- Accessibility: Ensuring that the storage solutions are at a convenient height and position for all guests enhances usability.
Materials and Aesthetic Choices
Choosing the right materials for hotel room wardrobes is crucial in maintaining durability while enhancing aesthetics. Popular material choices include:
- Wood: A classic option, wood offers warmth and elegance, available in various finishes and styles.
- Metal: For a modern twist, metal wardrobes present a sleek appearance and can be more resilient in high-traffic environments.
- Laminate and MDF: These materials offer cost-effective solutions that can mimic the look of wood while providing durability.
Popular Trends in Hotel Room Wardrobes
Current Designs That Impress Guests
As hotel aesthetics evolve, so do wardrobe designs, incorporating contemporary trends that resonate with guests today. Popular designs include:
- Minimalist Designs: These wardrobes favor clean lines and simplicity, reducing visual clutter.
- Color Versatility: Neutral palettes are favored, allowing wardrobes to blend seamlessly within varying room decors.
- Customizable Features: Wardrobes that allow guests to reconfigure compartments cater to individual storage needs.
Eco-Friendly Materials and Solutions
With a growing emphasis on sustainability, many hotels are opting for eco-friendly materials and designs in their wardrobes. Features include:
- Sustainable Wood: Sourced from responsibly managed forests, ensuring minimal environmental impact.
- Recycled Materials: Incorporating recycled items into wardrobe design reduces waste and promotes a greener approach.
Innovative Storage Ideas for Small Rooms
Small hotel rooms present unique challenges, prompting the need for innovative storage solutions within wardrobes. Some ideas include:
- Multi-Functional Options: Wardrobes that integrate a luggage rack or bench can optimize functionality.
- Vertical Storage: Utilizing vertical space with shelves and hooks allows guests to store more items without taking up additional floor space.
- Under-Bed Storage: Incorporating storage drawers beneath beds ensures added space without sacrificing room aesthetics.
Enhancing Guest Experience with Wardrobe Solutions
How Wardrobe Features Affect Guest Satisfaction
The design and features of a wardrobe can significantly impact overall guest satisfaction. Practical functionality combined with luxurious design elevates the guest experience. For instance, well-organized interiors can reduce stress, making it easier for guests to locate their belongings. Additionally, incorporating thoughtful features, such as removable shelves, enhances the practical use of the space.
Incorporating Technology into Wardrobe Designs
As technology advances, integrating smart features into hotel room wardrobes has become more prevalent. Smart wardrobes might include:
- Automated Lighting: Activated by motion sensors, lighting enhances visibility inside the wardrobe.
- Smart Mirrors: Mirrors with embedded technology can help guests view their outfits while preparing for outings.
- Climate Control: Some modern wardrobes come equipped with humidity regulation to preserve clothes.
Case Studies: Successful Hotel Wardrobe Implementations
Studying successful implementations of hotel wardrobes can shed light on effective strategies. For example, a luxury hotel in New York introduced custom wardrobes that feature built-in lighting, adjustable shelving, and a hidden safe. Feedback from guests indicated an improved overall experience, citing convenience and security as key factors.
Maintenance and Durability of Hotel Room Wardrobes
Best Practices for Care and Upkeep
Maintaining the appearance and functionality of hotel room wardrobes is essential for preserving guest satisfaction. Regular inspections and maintenance can prevent wear and tear. Best practices include:
- Routine Cleaning: Cleaning surfaces with suitable materials prevents staining and prolongs the life of the wardrobes.
- Checking Hardware: Regularly inspect hinges, knobs, and tracks for any signs of malfunction to guarantee smooth operation.
Long-lasting Materials for High Traffic Areas
To ensure longevity, it’s vital to select materials that can withstand the rigors of usage in high-traffic hotel areas. Durable options include:
- Bamboo and Teak: Both offer natural resistance to common wear, making them excellent choices for sustained use.
- High-Pressure Laminates: These resist scratches and damage, and they’re easy to clean, making them suitable for busy environments.
Signs of Wear and Replacement Considerations
Wardrobes, like any piece of hotel furniture, will eventually show signs of wear. Key indicators for replacement include:
- Structural Instability: If the wardrobe begins to lean or wobble, it may be time for a replacement.
- Cosmetic Damage: Scratches, dents, or peeling finishes detract from the room’s aesthetics and may necessitate replacement.
- Functionality Discrepancies: If drawers or doors fail to operate smoothly, it might affect the user experience significantly.
Revitalize Your Workspace with Mooswand Büro: The Benefits of Vertical Greenery
Understanding Mooswand Büro
In recent years, the concept of biophilic design has gained immense popularity in office environments, and among the various elements contributing to this trend is the Mooswand Büro, or moss wall. These living installations not only add aesthetic value but also foster a multitude of benefits for modern workspaces. This article explores the various facets of Mooswand Büro, including its definition, benefits, types of moss used, acoustic properties, installation considerations, and emerging trends in office landscaping.
What is a Mooswand Büro?
A Mooswand Büro refers to a moss wall specifically designed for office spaces. Unlike traditional artwork or decoration, these vibrant vertical gardens utilize preserved or live moss to enhance environmental quality and well-being. Mooswände (moss walls) can be employed in various configurations, from partitioning spaces to enhancing aesthetics in workplaces.
Key Benefits of Mooswand Büro
- Natural Aesthetics: Moss walls introduce a refreshing natural look into the workspace, promoting a calming atmosphere.
- Acoustic Absorption: Moss has remarkable acoustic properties, helping to reduce noise levels, which is vital in busy office settings.
- Improved Air Quality: Moss walls can help purify air by absorbing airborne pollutants and producing oxygen.
- Low Maintenance: Once installed, many moss walls require minimal upkeep, especially if preserved moss is used.
- Biophilic Connection: Incorporating greenery into office design promotes a connection with nature, enhancing employee mood and productivity.
Types of Moss Used in Office Settings
Several species of moss are favored for creating Mooswand Büro installations, primarily due to their aesthetic appeal and functional properties:
- Reindeer Moss: Known for its unique texture and color, reindeer moss is often used in decorative applications. Its lightweight nature makes it ideal for various installations.
- Pillow Moss: This soft, cushion-like moss provides a lush appearance and is known for its sound-absorbing qualities.
- Forest Moss: Often used in conservation and restoration, forest moss offers a rich green color that enhances any green wall.
The Aesthetic Appeal of Mooswand Büro
Designing with Mooswand Büro in Mind
Incorporating a Mooswand Büro into office decor involves thoughtful design considerations. The aim should be to create a cohesive look that aligns with the overall workspace theme. Factors to consider include the wall’s location, size, and integration with existing furniture. Whether as a statement piece behind a reception area or a subtle backdrop in a meeting room, moss walls can transform the aesthetics of any environment.
Color Psychology and Employee Wellbeing
The color green is often associated with tranquility, health, and renewal. Research indicates that exposure to greenery can alleviate stress and increase concentration levels among employees. The soothing shades of moss not only beautify the workplace but also contribute to employee well-being by reducing fatigue and promoting a positive environment.
Examples of Stunning Mooswand Büro Installations
Numerous companies have successfully integrated Mooswand Büro into their office designs as part of their commitment to sustainability and employee wellness. For instance, a leading tech firm created an entire wall of preserved moss in their breakout area, serving as a focal point that encourages employees to take short relaxation breaks. Another example includes a co-working space where moss dividers are used to create private zones while maintaining an open, collaborative feel.
Practical Considerations for Mooswand Büro
Installation Process and Costs
The installation of a Mooswand Büro typically involves several key steps. First, the intended space is evaluated to ensure it can support the weight and installation requirements of the moss wall. Subsequently, the moss is secured onto a suitable backing material, which is affixed to the wall. Costs can vary significantly based on the size and type of moss used, along with installation complexity. On average, businesses can expect to invest anywhere from $100 to $400 per square foot.
Maintenance Requirements and Benefits
One of the greatest advantages of moss walls is their low maintenance needs. Preserved moss walls require almost no watering or sunlight, while living moss installations have specific humidity needs that should be monitored. Regular dusting is typically all that is needed to keep the wall looking pristine. These maintenance requirements contribute to the wall’s affordability and functional longevity.
Where to Source Quality Mooswand Büro Products
Businesses seeking to install a Mooswand Büro can source products from a variety of suppliers. Established companies that specialize in green office design often carry high-quality moss options. Additionally, providers such as Freund GmbH and AS Hydroplant offer a range of moss products tailored for office environments. Researching local suppliers can also yield unique and sustainable options, supporting the idea of eco-friendly design.
Enhancing Acoustics with Mooswand Büro
How Mooswand Büro Contributes to Noise Reduction
Moss has been scientifically proven to absorb sound waves, making Mooswand Büro an effective solution for reducing echoes and ambient noise within an office. As workplaces grow more open and collaborative, the need for sound dampening becomes essential for employee comfort and productivity. By strategically placing moss walls, companies can create quieter areas conducive to focused work.
Case Studies Showing Improved Acoustics
Several case studies illustrate the effectiveness of moss walls in maintaining acoustics in office spaces. In one instance, an architectural firm reported a significant reduction in noise levels after installing a moss wall in their open-concept design, leading to increased productivity and employee satisfaction. Another study demonstrated that conference rooms fitted with moss walls experienced less sound bleed, resulting in more effective communication during meetings.
Choosing the Right Location for Maximum Effect
To maximize the acoustic benefits of Mooswand Büro, companies should carefully consider placement. Areas of high noise activity, such as near break rooms or near bustling cubicles, are ideal locations. Additionally, placement in meeting spaces can help minimize sound crossover from adjoining rooms, promoting a more focused and professional atmosphere.
Future Trends in Office Landscaping: Mooswand Büro
Emerging Designs in Office Greenery
As the trend of integrating nature into workspaces evolves, businesses are beginning to embrace more creative designs for their moss walls. From incorporating technology that mimics natural light to utilizing motion sensors that regulate humidity, the future of Mooswand Büro will blend functionality with innovation. Custom shapes and organic designs will continue to captivate designers and pique the interests of employees.
Eco-Friendly Practices and Sustainability
Corporate sustainability is becoming a priority for an increasing number of organizations. The adoption of moss walls aligns perfectly with these eco-friendly practices, as they draw on natural elements while promoting greener office environments. Companies are now investing in research to ensure that their moss sourcing is sustainable, focusing on preserving habitats and reducing the carbon footprint of their design choices.
The Role of Biophilic Design in Modern Workspaces
Biophilic design is gaining ground as a crucial element in contemporary workplace planning. It champions the integration of nature into built environments, thereby enhancing employee well-being and productivity. Mooswand Büro exemplifies biophilic principles, serving as a tangible representation of nature that improves aesthetics, acoustics, and air quality. As the body of research supporting biophilic design continues to grow, more businesses are likely to embrace this innovative concept, seeking to create happier and more effective workplaces.
Stylish Hotel Room Wardrobes: Enhance Your Guest’s Experience with Thoughtful Design
Understanding Hotel Room Wardrobes
What is a Hotel Room Wardrobe?
A hotel room wardrobe is an essential piece of furniture that serves as a dedicated space for guests to store their clothing, luggage, and personal items during their stay. Unlike standard residential wardrobes, hotel wardrobes are designed with traveler convenience in mind. They often feature a variety of accommodations, such as hanging space for garments, shelving units for shoes and bags, and sometimes additional drawers for miscellaneous items. The primary purpose of these wardrobes is to offer functionality and ease of access, enhancing the overall guest experience while maintaining a streamlined aesthetic.
Hotels often utilize wardrobes not just for storage but also as an integral part of the room’s design. When guests walk into their hotel room, the wardrobe’s appearance can significantly influence their perception of the space, importance in hospitality design cannot be understated. For more information on designing these essential fixtures, visit Hotel Room Wardrobes.
Key Features of Modern Hotel Wardrobes
Modern hotel wardrobes boast several key features that enhance their utility and appeal:
- Smart Design: Many contemporary wardrobes incorporate space-saving layouts, often fitting into corners or being built-in to optimize room space.
- Sustainability: Increasingly, hotel wardrobes are being made from eco-friendly materials, reflecting a commitment to sustainability and reducing carbon footprints.
- Technology Integration: Some wardrobes are now equipped with USB ports and other charging options, catering to tech-savvy guests.
- Custom Finishes: Hotel wardrobes can be customized with various finishes and colors to match the overall aesthetic of the hotel.
- Security Features: Addition of lockable spaces within wardrobes provides guests with peace of mind regarding their valuables.
Importance of Design in Guest Experience
The design of hotel room wardrobes plays a crucial role in enhancing guest experience. A well-designed wardrobe contributes to the operational aspects of a hotel room by providing ample storage space for a variety of guest items. Moreover, it also reflects the hotel’s brand identity. Classy, elegant wardrobes might appeal to luxury travelers, while simpler, more functional designs might cater to budget-conscious tourists. Ultimately, aligning the wardrobe’s design with the hotel’s branding while ensuring it meets guests’ needs is fundamental to creating a satisfied customer base.
Types of Hotel Room Wardrobes
Freestanding vs. Built-in Wardrobes
Hotel room wardrobes can be categorized mainly into two types: freestanding and built-in. Each type has its advantages and caters to different hotel layouts and design schemes.
Freestanding Wardrobes are standalone units that can be placed anywhere in a room. They provide flexibility in terms of placement and can easily be moved or replaced. These wardrobes are often designed with a more traditional aesthetic, appealing to guests who appreciate a classic touch.
On the other hand, Built-in Wardrobes are constructed within the walls of the room, creating a seamless look that can save space. These wardrobes tend to offer more storage capacity and can be custom-designed to fit the exact dimensions of a room, integrating perfectly with the surrounding décor.
Wardrobe Styles for Various Themes
When selecting a wardrobe for hotel rooms, it’s essential to consider the overall design theme of the establishment. Different styles can evoke specific moods or atmospheres, influencing guest perceptions upon arrival. For instance:
- Modern Minimalist: Wardrobes with sleek lines, neutral colors, and minimal ornamentation fit seamlessly within a minimalist hotel.
- Classic Elegance: Ornate wooden wardrobes with intricate carvings align with luxurious hotel experiences.
- Eco-Friendly: Using sustainable materials, like reclaimed wood, for the wardrobe can enhance eco-conscious branding while appealing to environmentally-minded travelers.
- Industrial Chic: Metal, open-shelving wardrobes can embody the edgy aspects of urban-themed hotels.
Functionality and Storage Solutions
Modern hotel guests expect more than just basic storage options. Therefore, functionality in wardrobe design has become a priority. Here are some aspects to consider:
- Hanging Space: Sufficient hanging rods should be available to accommodate long garments.
- Drawers and Shelves: Adding a variety of drawer sizes allows guests to organize accessories, shoes, and personal items conveniently.
- Luggage Racks: Including designated luggage racks can improve convenience for guests who may need to unpack and pack efficiently.
- Multi-Functionality: Consider wardrobes that can serve multiple purposes, such as a compact workspace.
Choosing the Right Wardrobe for Your Hotel
Considerations Based on Hotel Size
The size of the hotel significantly influences wardrobe selection. For smaller hotels or boutique-style accommodations, compact wardrobes that maximize vertical storage may be optimal. In contrast, larger hotels often benefit from spacious, built-in options that can cater to multiple guests sharing a room. Additionally, having a consistent wardrobe style across all rooms can create a unified aesthetic, enhancing the hotel’s branding.
Material Selections for Durability
Durability is an essential characteristic when selecting materials for hotel wardrobes. Considering the high foot traffic and the need for longevity, materials like solid wood, plywood, or high-grade MDF are commonly preferred. Moreover, finishes should be scratch-resistant, water-resistant, and able to withstand daily wear and tear. This investment ensures that the wardrobes remain functional and aesthetically pleasing for an extended time period.
Color Palettes That Enhance Ambiance
The color of a wardrobe can significantly affect the ambiance of a hotel room. Lighter colors tend to create an illusion of space and airiness, while darker tones can add sophistication and warmth. The color chosen should align with the hotel’s overall theme and enhance the intended atmosphere of each room. Consulting a design expert can be beneficial when determining the right palette for your hotel’s wardrobe.
Trends in Hotel Room Wardrobes
Eco-Friendly Designs and Materials
With sustainability becoming a priority in both hospitality and guest preferences, eco-friendly designs for hotel wardrobes are gaining traction. Select wardrobes that utilize reclaimed wood, recycled materials, or sustainably sourced products. This not only reduces the environmental impact but also appeals to an increasing demographic of eco-conscious travelers. Furthermore, integrating natural finishes can enhance the overall appeal, combining aesthetics with a sustainable ethos.
Technological Innovations in Wardrobe Design
Incorporating technology into wardrobe design is another trend that’s shaping the future of hotel furniture. Innovations such as built-in charging stations, lighting that activates when the wardrobe door opens, or even smart locks for secure storage, can elevate the functionality of hotel wardrobes. Such features offer convenience, aligning with the tech-savvy nature of today’s travelers and ensuring that their needs and expectations are met efficiently.
Customization Options for Hotels
In an increasingly competitive market, hotels are turning to customized wardrobes to enhance guest experiences. Customized solutions can include branding the wardrobe interiors, creating bespoke furniture pieces, or even tailored storage solutions to meet the specific needs of various traveler demographics, such as business professionals, tourists, and families. Customized wardrobes not only help reflect the hotel’s unique character but also cater directly to guests’ needs.
Maximizing Guest Satisfaction with Hotel Room Wardrobes
Best Practices for Wardrobe Usage
To maximize guest satisfaction, hotels need to promote effective usage of the wardrobe. This can be achieved through:
- Providing clear instructions on how to use special features, such as adjustable shelves or hidden compartments.
- Ensuring garments are easily accessible and encouraging guests to use the provided space effectively.
- Regularly maintaining the wardrobe – ensuring the interiors remain clean, odors are neutralized, and there is no damage.
How Wardrobe Design Reflects Brand Values
The wardrobe can reflect a hotel’s brand values in multiple ways, from the materials chosen to the design aesthetics. For example, hotels promoting luxury will typically opt for high-end finishes and features, whereas eco-friendly establishments might focus on sustainable materials. This congruity enhances the guest experience, allowing visitors to feel that every aspect of their stay resonates with the hotel’s signature values.
Feedback Mechanisms for Continuous Improvement
To ensure that hotel wardrobes meet guest expectations, implementing feedback mechanisms is vital. Encouraging guests to provide their opinions can help identify areas for improvement. Consider utilizing digital surveys, informal conversations during check-out, or placing suggestion boxes around the hotel to gather valuable insights. This information can guide future decisions on wardrobe design and functionality, ultimately elevating the guest experience.

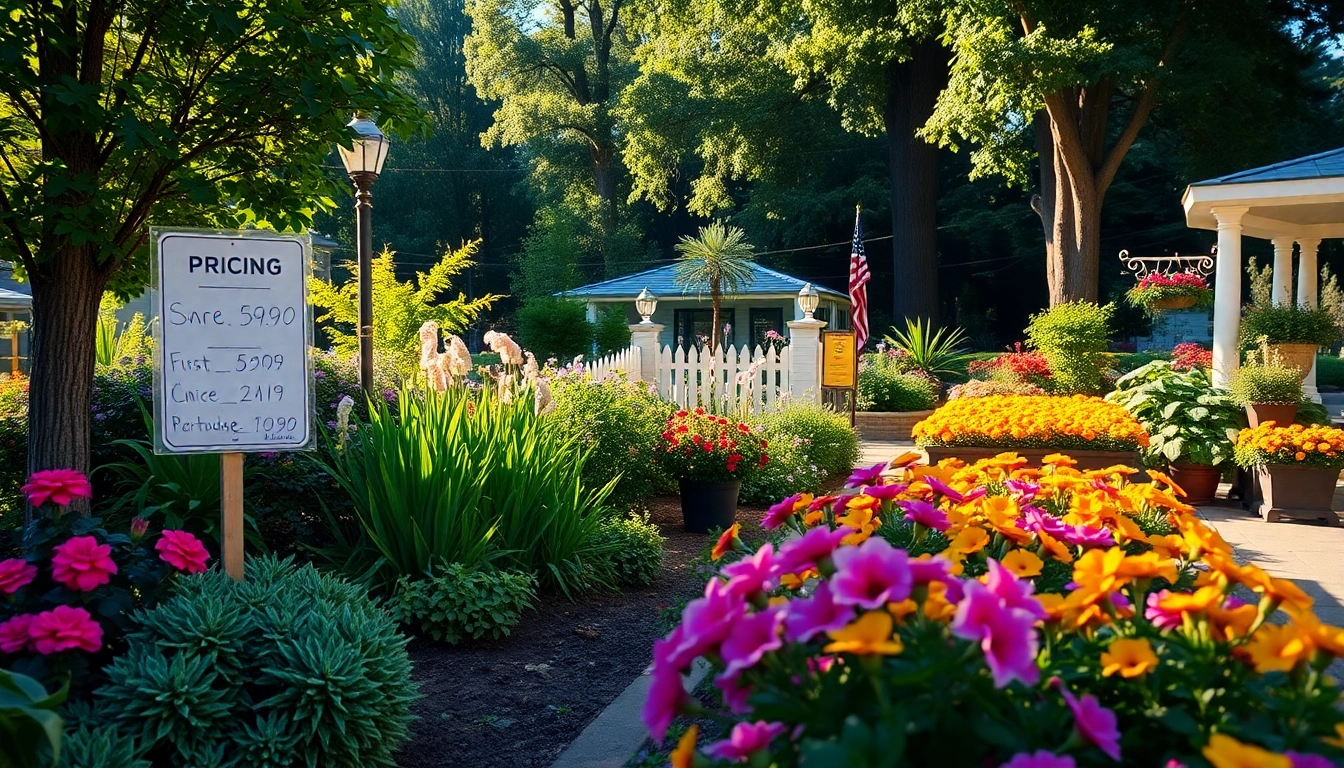
Understanding Landscaping Company Pricing: What to Expect for Quality Services
1. Introduction to Landscaping Company Pricing
When considering outdoor enhancements to your home or business, understanding landscaping company pricing is crucial. The landscape of your property is often seen as an extension of your interior design, serving as both an aesthetic enhancement and a functional outdoor space. However, navigating the myriad services and associated costs can be challenging. This article aims to demystify the pricing structures associated with landscaping, providing insights into what influences these costs and how to plan effectively for your landscaping projects.
1.1 Overview of Landscaping Services
Landscaping services encompass a wide range of activities that improve the aesthetics, functionality, and value of an outdoor space. From routine lawn care to intricate landscape design, these services can vary significantly in scope and price. Common offerings include:
- Lawn Maintenance: Regular mowing, fertilizing, and pest control to keep your grass vibrant and healthy.
- Landscape Design: Creating blueprints for your outdoor space that consider both plant selection and hardscaping elements.
- Installation Services: Planting trees, shrubs, and flowers, as well as installing patios, walkways, and other features.
- Irrigation Systems: Installation and maintenance of watering systems to ensure plants thrive.
- Seasonal Clean-Up: Preparing your landscape for winter or refreshing it in the spring.
Understanding this landscape service matrix is key not only for recognizing value but also for anticipating costs.
1.2 Importance of Pricing Transparency
Transparency in pricing helps consumers make informed decisions. It ensures that clients understand what services they are paying for and at what rate. Landscaping companies that offer clear, itemized estimates foster trust and confidence in their capabilities. The lack of transparency can lead to misunderstandings, disputes over charges, and dissatisfaction with the quality of work performed.
1.3 Factors That Influence Pricing
Several factors can affect the pricing of landscaping services:
- Scope of the Project: Larger, more complex projects typically require more time and resources, leading to higher costs.
- Location: Geographic demand, local labor costs, and availability of materials can all influence pricing.
- Timing: Seasonal demand can impact prices; for instance, spring and summer often see a surge in landscaping services.
- Company Reputation: Established companies with strong portfolios may charge premium rates reflecting their experience and quality of work.
- Materials and Plants Used: The type and quality of materials and plants used can significantly affect overall costs.
2. Breakdown of Common Landscaping Services
2.1 Lawn Maintenance and Care Costs
Lawn maintenance is a foundational service within the landscaping industry. Its costs depend on various elements, including the size of the lawn, the frequency of maintenance, and additional treatments like aeration or overseeding. Here’s a detailed breakdown:
- Routine Mowing: Typically charged per visit, with prices ranging from $30 to $80, depending on the lawn’s size and the terrain.
- Fertilization: Fertilizer applications might cost between $100 to $300 per season, depending on the type of fertilizer and the number of treatments required.
- Pest Control: Customized pest control treatments can range from $50 to $150 per application.
- Seasonal Care: Aeration and overseeding services can cost between $75 to $200, depending on the lawn’s condition.
Overall, homeowners can expect to spend between $200 to $1,000 yearly on comprehensive lawn care, depending on the level of service and size of the property.
2.2 Landscape Design and Installation Pricing
Landscape design and installation comprise the creative and functional aspects of landscaping. The costs associated with this service can vary widely:
- Design Services: Professional landscape design consultations can start at $50 per hour and can go up to $150 per hour or more for highly experienced designers.
- Installation Labor: This can cost anywhere between $50 to $150 per hour. For a complete design and installation project, total costs may range from $2,000 for simpler designs to $10,000 or more for intricate projects.
- Hardscaping Costs: Installing features such as patios, walls, or walkways can add significant costs, often ranging from $15 to $50 per square foot.
- Plant Material: The cost of plants varies significantly based on type and size. For example, small bedding plants could cost $3 to $10 each, while mature trees may range from $100 to $500 or more.
Ultimately, the total investment can vary significantly based on a homeowner’s vision and budget; a comprehensive landscape installation can typically range from $3,000 to $15,000.
2.3 Additional Services and Their Costs
Beyond lawn maintenance and major landscaping projects, homeowners may consider additional services which can impact overall pricing:
- Irrigation Systems: The installation of a new irrigation system typically ranges from $1,500 to $3,000 based on yard size and system complexity.
- Seasonal Clean-Up: These services average between $200 to $600, depending on the breadth of cleaning needed.
- Tree Trimming and Removal: Routine trimming can range from $100 to $300, while tree removal often costs between $300 and $1,500.
- Landscape Lighting: Installing landscape lighting can require an investment between $2,000 and $5,000, depending on the extent and equipment required.
3. Comparing Quotes from Landscaping Companies
3.1 How to Request Accurate Estimates
Requesting accurate estimates is an essential step in ensuring you receive fair pricing for services. Begin by doing the following:
- Be Specific: Clearly outline your desired services, including specifics like dimensions, plants, and features.
- Set a Timeline: Clearly communicate any project start dates or seasonal considerations to avoid misalignment.
- Ask for Itemized Quotes: Ensure quotes detail costs of labor, materials, and any additional fees to understand what you’re being charged for.
After gathering quotes, compare them not only based on pricing but also on the scope of services offered and the quality perceptions of each company.
3.2 Understanding Pricing Models (Flat Rate vs. Hourly)
Landscaping services typically operate on two primary pricing models:
- Flat Rate: This involves a set fee for a predefined scope of work. It’s beneficial for homeowners because it provides price certainty.
- Hourly Rate: Charged based on actual time spent working, this model may fluctuate depending on the project scope and unforeseen issues that may arise.
Choosing between these models depends on the complexity of the project; flat rates are good for straightforward tasks, while hourly rates may work better for dynamic services requiring frequent adjustments.
3.3 Evaluating Value vs. Cost
When comparing quotes, evaluating value is as important as assessing costs. Consider the following:
- Quality of Work: Investigate customer reviews and before-and-after project images to gauge the company’s craftsmanship.
- Services Offered: Some companies may provide inclusive services, while others may charge separately for additional offerings.
- Experience and Expertise: Companies with extensive experience may charge higher rates but might deliver superior, more reliable results.
Ultimately, it is about aligning pricing with the expected quality of work to ensure your investment yields long-term benefits.
4. Hidden Costs in Landscaping Services
4.1 Seasonal Pricing Variations
Pricing in landscaping can fluctuate with the seasons. Spring often leads to higher demand, and prices can reflect that. Conversely, winter may see lower prices as companies try to attract clients during quieter months. Understanding these dynamics can help you plan your service needs more strategically and save money.
4.2 Additional Fees and Charges to Watch For
Several possible fees might not be included in initial estimates. Awareness of these can prevent budget overruns:
- Permit Fees: Some landscaping projects require permits, which can add significant costs if not accounted for from the outset.
- Travel Charges: Companies may have travel fees, especially if your property is located outside their typical service area.
- Disposal Fees: Removing old vegetation or hardscaping can incur disposal costs; clarify these with your company ahead of time.
4.3 Long-term Cost Considerations
Consider the long-term implications of landscaping investments. For instance:
- Maintenance Costs: Some installations require more upkeep than others; for instance, a garden filled with exotic plants may incur higher watering and care costs.
- Property Value: Well-executed landscaping can provide a substantial return on investment (ROI), significantly increasing your property’s value.
- Energy Savings: Strategic planting can lead to reduced energy costs by providing shade and reducing heating needs.
5. Tips for Budgeting Your Landscaping Project
5.1 Setting a Realistic Budget
Setting a budget is not merely about determining how much you’re willing to spend; it’s about outlining a financial plan that encompasses all necessary services. Begin with a comprehensive assessment of your property and landscaping goals. This assessment helps define the scope of work, which directly informs budgeting.
5.2 Prioritizing Your Landscaping Needs
Determining which aspects of landscaping are most important to you can inform your budget allocation. Consider:
- Essential Services: Identify which services are critical for immediate improvement, like lawn care and basic maintenance.
- Aesthetic Enhancements: Plan for additional delight items, such as flower beds or landscape lighting, after addressing your fundamentals.
- Future Projects: If you have aspirations for your landscaping, set aside funds for future enhancements.
5.3 How to Maximize Your Return on Investment
Achieving a strong ROI from your landscaping investment involves methods such as:
- Investing in Perennials: These plants will save you money over time as they return season after season.
- Choosing Low-Maintenance Solutions: Select plants and landscaping designs that require minimal upkeep.
- Seasonal Interest: Design your landscape with plants that bloom in various seasons for year-round visual appeal.
In the end, wise planning and informed choices can help you realize the full potential of your outdoor spaces while keeping costs in check. Landscaping is not just an expense; it is a long-term investment in the protection and enhancement of your property.

Understanding Landscaping Company Pricing: Factors That Influence Your Costs
Introduction to Landscaping Company Pricing
When it comes to landscaping, understanding pricing can feel like navigating a complex labyrinth. Whether you’re considering sprucing up your garden or embarking on a complete landscape overhaul, knowing how landscaping company pricing works is essential for establishing a budget and ensuring you get the quality service you deserve. In this comprehensive guide, we’ll delve into the intricate factors influencing landscaping costs, the various pricing models adopted by landscapers, and offer valuable insights that will empower you to make informed decisions for your outdoor spaces.
What Determines Landscaping Costs?
Landscaping costs can vary significantly based on several intricate factors. Here, we dissect each element that contributes to the overall price you can expect to pay for landscaping services.
- Type of Service: Different landscaping services—such as lawn installation, hardscaping, and garden design—carry different costs due to the skills and materials required.
- Landscaper’s Experience: The expertise of the landscaping company plays a crucial role. Highly experienced professionals may charge more, but they often deliver superior results.
- Project Size: Larger projects will naturally cost more due to the increased labor, time, and materials involved.
- Seasonality: Landscaping costs may fluctuate seasonally; certain times of the year might see increased demand and, consequently, higher prices.
Common Pricing Models Used by Landscapers
Understanding the various pricing models can help you anticipate costs and choose a landscaping company that best fits your budget. Below are the most commonly used pricing strategies:
- Hourly Rate: Many landscapers charge an hourly rate, which can vary widely based on expertise and location.
- Flat Fee: For specific services, such as lawn installation or planting, landscapers may offer a flat fee based on the project’s scope.
- Per Square Foot: This method is often used for larger projects, such as patio installations, where costs are determined based on the area being worked on.
Regional Differences in Landscaping Prices
The geographical location significantly impacts landscaping pricing. Urban areas typically face higher costs due to increased demand and living expenses. Conversely, rural regions may offer more competitive pricing, but this can vary widely based on local economic conditions. Furthermore, local regulations and environmental factors can also dictate costs in different regions, adding another layer of complexity to pricing.
Key Factors Influencing Landscaping Company Pricing
Several key factors contribute to how landscaping companies determine their pricing. Being informed about these can help you better navigate conversations with potential landscapers.
Type of Services Offered
The range of services a landscaping company provides can dramatically affect pricing. Comprehensive services—such as design, construction, maintenance, and consultation—often lead to varied costs. For example, full-scale landscape design services that include architectural plans and planting schemes will usually demand a higher price point compared to basic lawn maintenance.
Size and Complexity of the Project
The size and complexity of your landscaping project play significant roles in determining the overall cost. Larger projects not only require more materials but also more labor hours. For instance, a simple garden bed might take a day for a landscaping team to install, whereas a comprehensive backyard transformation could stretch over a week and involve various trades and equipment.
Material Quality and Sustainability
Material choice is pivotal when it comes to landscaping costs. Premium materials, such as natural stone or quality hardwood for decking, will elevate your expenses. Additionally, opting for sustainable or eco-friendly materials can also impact the price, as these options sometimes come at a premium but can lead to long-term savings and environmental benefits.
Understanding Pricing Structures
A deep understanding of pricing structures enables homeowners to make better financial decisions regarding landscaping projects. This section breaks down the fundamental pricing structures you may encounter.
Hourly Rates vs. Flat Fees
Landscaping companies typically operate under two primary billing structures: hourly rates and flat fees. An hourly rate may benefit smaller jobs where hours can be closely monitored. In contrast, flat fees are often more advantageous for larger projects, providing homeowners with a clear total cost upfront, thus eliminating unexpected financial surprises.
How Estimates Are Calculated
When requesting quotes, landscapers typically provide estimates based on a combination of labor, materials, and additional overhead costs. By understanding how estimates are constructed, you can negotiate effectively and ensure that you’re getting value for your investment.
Hidden Costs to Consider
Many homeowners overlook hidden costs that can arise during landscaping projects, which may include permit fees, landscape maintenance after installation, and unexpected changes to the project scope. Understanding these potential expenses will help you prepare a more realistic budget and avoid financial strain.
Budgeting for Your Landscaping Project
Proper budgeting is crucial in any landscaping endeavor. This section outlines how to set a reasonable budget while considering various factors that may affect costs.
Setting a Realistic Landscaping Budget
Establishing a budget begins with determining how much you can comfortably spend on your landscaping project. This should include quotes from multiple landscaping companies, factoring in both materials and labor, and adding a contingency fund of at least 10-15% for unexpected expenses.
When to Invest More for Quality Work
While sticking to a budget is essential, there are times when investing more can ultimately save you money and provide better results. When facing significant landscaping changes, consider if higher-quality materials or experienced professionals can yield a return on your investment in the long run.
Financing Options for Landscaping Projects
If your project exceeds your available budget, various financing options may be available, such as personal loans or payment plans offered by landscaping companies. Researching local lending institutions can provide insights on low-interest loans specifically for home improvements, including landscaping.
Frequently Asked Questions About Landscaping Pricing
As a homeowner, you likely have many questions about landscaping pricing. Below are some frequently asked queries that can provide clarity on the topic.
What to Expect in Initial Consultations?
During the initial consultation, landscapers typically assess your property, listen to your ideas, and discuss budget constraints. Expect to receive valuable feedback about what is feasible and recommendations based on your specific needs and preferences.
Are Landscaping Services Worth the Investment?
Investing in professional landscaping can significantly enhance your property’s aesthetic appeal and value. Well-executed landscaping can also improve functionality, create inviting outdoor spaces, and benefit your home’s curb appeal, making it a worthwhile expense for most homeowners.
How to Compare Quotes Effectively
When comparing quotes from different landscaping companies, examine not just the total cost but also the services included, the perceived quality of materials, and the overall professional reputation. A lower quote may be enticing, but it’s essential to weigh that against the company’s experience and customer reviews.
Conclusion
Navigating the complexities of landscaping company pricing does not have to be daunting. By understanding the factors that influence costs and employing solid budgeting strategies, homeowners can set realistic expectations and get the best value from their landscaping investments. With the right knowledge and preparation, your dream landscape can become a tangible reality.
Comprehensive Landscaping Company Pricing: Understanding Costs for Your Dream Garden
Understanding Landscaping Company Pricing
Landscaping can transform any outdoor space, from residential backyards to commercial properties, enhancing aesthetics and usability. However, one of the most common queries prospective clients have is about the landscaping company pricing. Understanding how these prices are determined can help you budget effectively and choose the right service for your needs.
Factors Influencing Pricing
Several factors contribute to the pricing of landscaping services, making it essential for consumers to understand what they are paying for. Below are the primary elements influencing landscaping costs:
- Project Complexity: The intricacy of the design and the scope of work considerably impact overall costs. Simple lawn maintenance will generally cost less than a complete renovation that includes grading, detailed planting schemes, and hardscaping.
- Materials Used: The choice of materials, such as plants, soil, mulch, and hardscape elements like stone and pavers, affects the budget. Premium materials will increase costs but often yield better long-term results.
- Labor: Labor costs vary significantly based on geographic location, skill level of the workers, and the duration of the project. Higher wages in urban areas typically lead to increased service fees.
- Seasonality: Landscaping prices may fluctuate throughout the year, with peak seasons typically seeing higher rates due to increased demand. Planning your project during off-peak times can save money.
- Additional Services: Extra services such as irrigation installation, ongoing maintenance, or pest control can add to the overall pricing and should be considered when budgeting.
Common Pricing Models
Landscaping companies often use different pricing models, which can affect how customers view their costs. The most prevalent models include:
- Per Square Foot: Many landscaping services charge based on the square footage of the area to be landscaped. This model is beneficial for clients with specific dimensions, leading to transparent pricing.
- Project-Based Pricing: For more extensive or complex projects, a flat project fee may be determined upfront. This model allows both the client and the company to agree on costs before any work begins.
- Hourly Rates: Some landscaping companies charge by the hour, which can vary based on skill level and experience. This model may be more suitable for smaller tasks or maintenance work.
- Package Deals: Certain companies offer bundled services for a fixed price, such as seasonal clean-ups, maintenance, or design and installation. These packages can be more cost-effective for clients seeking comprehensive care.
Average Costs in Different Regions
Landscaping costs can vary dramatically depending on geographic location. Here’s a breakdown of average costs observed in different regions of the United States:
- Northeast: In states like New York and Massachusetts, average landscaping costs range from $4,000 to $10,000 for comprehensive projects, including planting and hardscaping.
- South: In states like Florida and Texas, landscaping prices tend to be lower due to milder climates, commonly falling between $3,000 to $8,000.
- Midwest: Regions like Illinois and Ohio may see average prices from $4,000 to $9,000 depending on the project’s scope, especially during peak seasons.
- West: In California, landscaping projects can be on the higher end, with costs averaging $5,000 to $12,000, driven by labor costs and diverse ecosystems.
Comparison of Landscaping Services
When considering landscaping services, it’s vital to distinguish between residential and commercial landscaping needs, as the pricing often reflects the nature and scale of the project.
Residential vs. Commercial Landscaping Pricing
Residential landscaping typically focuses on personal aesthetic preferences and enhancing curb appeal, while commercial landscaping often emphasizes functionality and professional appearance. Here’s a deeper look into how pricing differs between these two categories:
- Residential Landscaping: These projects usually involve design, planting, and maintenance tailored to homeowners and generally cost between $2,000 to $10,000, depending on the project scale.
- Commercial Landscaping: For businesses and public spaces, projects can be more extensive and are often designed to attract customers or enhance safety, with costs typically ranging from $8,000 to $25,000.
- Maintenance Services: Maintenance for residential yards may be charged hourly or through a service plan, while commercial properties are often under contract agreements for regular upkeep to maintain their pristine appearance.
Factors Affecting Service Costs
Several components impact service costs in landscaping, continually influencing how companies price their services:
- Job Size: The more extensive the project, the higher the cost due to increased labor and material requirements.
- Design Complexity: Intricate designs with various elements, including water features and unique plantings, will increase costs.
- Site Conditions: Existing site conditions such as poor soil quality, uneven terrain, or restricted access can complicate projects and elevate prices.
- Client Expectations: Custom requests or special requirements may lead to higher costs if they deviate from standard practices.
What to Look for in Estimates
When seeking estimates, it’s crucial to compare multiple companies and understand what is included in each proposal. Here’s what you should look for:
- Detailed Breakdown: A comprehensive estimate should include a breakdown of materials, labor, permits, and any additional costs.
- Timelines: Understanding the projected timeline is vital, as delayed projects can lead to unexpected costs.
- Warranties: Look for information regarding warranties or guarantees on both plants and workmanship.
- References: Seeking past client references can provide insights into a company’s reliability and quality of work.
Value for Investment in Landscaping
Investing in landscaping can yield significant returns beyond just aesthetic improvements. Whether it’s personal enjoyment of your home or an increased value for your business, here are some factors that highlight the long-term value of professional landscaping.
Long-Term Benefits of Professional Landscaping
Professional landscaping provides various long-term benefits, including:
- Aesthetic Appeal: Well-maintained landscapes enhance beauty and charm, positively influencing first impressions.
- Increased Usable Space: Properly designed outdoor areas can become extensions of living and working spaces.
- Environmental Benefits: Professional landscaping can contribute to environmental goals, such as reducing erosion and improving air quality.
- Functional Health: Thoughtfully designed landscapes can support outdoor activities, improve mental health, and create spaces for social gatherings.
Budgeting for Upgrades and Maintenance
Regardless of the initial investment in landscaping, ongoing maintenance ensures the longevity of your investment. Consider the following when budgeting:
- Regular Maintenance: Budget for upkeep such as mowing, pruning, and seasonal cleanups to maintain the property’s ambiance.
- Upgrades: Factors such as plant health, pest problems, or changing design trends may prompt additional investments over time.
- Seasonal Preparations: Invest in winter preparations such as snow removal and fall clean-ups to protect your landscape.
Enhancing Property Value Through Landscaping
Well-planned landscaping can significantly increase property values. Research suggests that landscaping can yield a return on investment of 100% to 200%:
- Curb Appeal: An attractive façade draws potential buyers, making properties more appealing in the market.
- Energy Efficiency: Strategic planting can lower energy costs by providing shade and privacy, factors that buyers often consider valuable.
- Functional Spaces: Landscapes that offer outdoor living areas or gardens are often favored by homebuyers.
Common Myths About Landscaping Pricing
Misconceptions around landscaping costs can lead to misunderstandings and unanticipated expenses. Dispel these common myths to foster better communication with landscaping companies.
Misconceptions that Can Cost You
Here are some widespread misconceptions about landscaping pricing:
- DIY is Always Cheaper: While DIY options may seem cheaper at first, costs can escalate if mistakes are made during the project.
- All Companies Charge the Same Rates: Prices can vary widely among landscaping companies based on services and quality levels.
- Seasonal Discounts Aren’t Worth It: Many companies offer discounts during off-peak seasons, which can provide significant savings.
Clarifying Average vs. Premium Pricing
Understanding the distinction between average services and premium offerings is crucial. Here are some points to keep in mind:
- Quality of Work: Premium services typically involve highly skilled labor and superior materials, which justify higher costs.
- Design Services: Companies providing custom design and planning services often charge higher rates for their expertise.
- Client Satisfaction: Companies with strong reputations often charge more but can guarantee greater satisfaction through proven results.
Understanding Additional Costs and Hidden Fees
Landscaping estimates may include hidden fees that can catch clients off guard. Be aware of the following:
- Permit Fees: Ensure you understand any required permits for landscaping changes, as these may not be included in initial estimates.
- Disposal Fees: Removal of existing plants and materials may incur additional charges, which should be discussed upfront.
- Ignore Extras: Companies may upsell services such as seasonal maintenance, which can add unexpected costs to your overall investment.
Getting the Best Value from Your Landscaping Investment
To maximize returns on your landscaping investment, it’s essential to take a strategic approach when selecting a company and negotiating services.
Choosing the Right Landscaping Company
Selecting a landscaping company is one of the most critical steps in ensuring a successful project. Here’s what to consider:
- Research: Look into a company’s reputation, customer feedback, and portfolio of past work to gauge quality.
- Accreditations: Ensure the landscaping company has appropriate licenses and certifications, which can indicate professionalism and reliability.
- Experience: Choose companies with experience in similar projects, as familiarity often leads to superior results.
Negotiating Pricing and Services
Don’t hesitate to negotiate pricing with potential landscaping companies. Effective negotiation strategies include:
- Get Multiple Quotes: Comparing estimates can provide leverage and help reveal industry pricing standards.
- Know Your Budget: Enter negotiations with a clear budget, making it easier to reject quotes that exceed your limits.
- Ask About Discounts: Inquire about any promotional offers or package deals that could help lower costs.
Evaluating Quality vs. Cost in Landscape Projects
It’s vital to balance quality and cost effectively. Here’s how to evaluate potential landscaping projects:
- Prioritize Quality: While staying within budget is essential, choosing lower quality services can lead to greater long-term costs.
- Look for Value: Assess the added benefits of higher-priced quality services, such as improved outcomes and longer warranties.
- Review Detailed Estimates: Analyze bids carefully, focusing on what’s included and whether it aligns with your goals and expectations.

Understanding Landscaping Company Pricing: A Comprehensive Breakdown for Every Budget
Introduction to Landscaping Company Pricing
Getting your landscape just right can be both an exciting and daunting process, particularly when it comes to understanding landscaping company pricing. With diverse options and varying costs, it can be challenging to make informed decisions. This guide will delve into the primary factors influencing landscaping costs, how to categorize services, and the pricing structures typically applied by landscaping professionals. Understanding these elements will empower you to manage your budget effectively and choose a service that aligns with your needs. To start, let’s explore the factors that influence pricing in landscaping.
What Influences Pricing in Landscaping?
Several factors contribute to the overall pricing of landscaping services. These include:
- Scope of the Project: Larger and more complex projects naturally demand higher costs. Projects that require significant soil work or installation of hardscapes (like patios or retaining walls) tend to be more expensive.
- Location: Pricing can fluctuate significantly based on geographic area. Regions with higher living costs will typically incur higher service fees.
- Expertise Level: Landscaping companies with extensive experience and specialized skills often charge more but can also provide superior quality and design.
- Materials Used: The choice of plants, stones, mulch, and other materials impacts the final pricing. Premium materials generally lead to a higher total cost.
- Seasonal Demand: Pricing may vary with the seasons. For instance, spring and early summer are peak times for landscaping, which may increase costs due to high demand.
Understanding Different Service Levels
Landscaping services can vary dramatically based on the level of work provided. Here are the common service levels:
- Basic Maintenance: This includes tasks like lawn mowing, edging, and trimming hedges. Typically, prices start from as low as $50 for basic upkeep.
- Intermediate Services: Involves more detailed work such as seasonal plantings, mulching, and minor landscaping modifications. Expect costs to range between $300 to $800.
- Advanced Design and Installation: Comprehensive services include landscape design consultations, new gardens, and hardscaping. These projects can often surpass $2,000.
Overview of Common Pricing Structures
Landscaping pricing structures may vary widely, but there are a few common methods:
- Per Square Foot: Many companies charge based on the area that needs to be landscaped. This can range from $4 to $12 per square foot, depending on the complexity of the work.
- Hourly Rates: Some freelancers and smaller operations may instead bill on an hourly basis, with rates typically ranging from $30 to $70 per hour based on skill level and location.
- Flat Rates: For specific services such as tree trimming or fertilization, companies may provide flat rates regardless of time spent.
Average Costs of Landscaping Services
Understanding the average costs for landscaping services provides a benchmark for budgeting your project. Below is a breakdown of costs you might encounter.
Pricing for Basic Services
Basic landscaping services like lawn maintenance generally fall within a standard range. For example:
- Basic lawn care can often cost around $50-$70 per service.
- Fertilization services typically range from $100 to $300 for treatments.
- Simple hedge trimming can cost anywhere from $50 to $200, depending on plant size.
Estimating Costs per Square Foot
When it comes to larger projects, estimating costs per square foot is a practical approach. For example, new landscaping installations generally charge between $4 to $12 per square foot. Here’s how this is broken down:
- Basic Landscaped Areas: Expect costs at around $4 – $6 per square foot.
- Intermediate Areas: More detailed landscaping, including some hardscaping, may set you back about $8 – $10 per square foot.
- Advanced Features: Areas with intricate designs or high-quality materials can rise to $12 per square foot or more.
Seasonal Factors Affecting Prices
Seasonality plays a crucial role in landscaping pricing. For example:
- Spring and Summer: Demand peaks and prices often increase for services like planting and garden design.
- Fall and Winter: Costs may decrease as demand drops, though these seasons are typically used for preparation such as planting bulbs or laying mulch.
How to Get Accurate Landscaping Quotes
Getting an accurate quote for your landscaping project involves more than just reaching out to contractors. Here are effective strategies to ensure you receive a fair estimate.
Tips for Requesting Estimates
When contacting landscaping companies for quotes, consider the following:
- Be Clear and Specific: Clearly outline your needs and desires, including the type of landscape design and existing landscape features you have.
- Provide Accurate Measurements: If you can, provide or measure the area that will require work to help landscapers provide a more accurate estimate.
- Ask for Detailed Itemization: Request a breakdown of costs for labor, materials, and any additional fees or potential hidden costs.
What to Include in Your Quote Request
Your request for estimates should include key details:
- Your budget for the project.
- The type of landscaping services you are interested in.
- Timeline for project completion.
- Any specific materials or botanical preferences you may have.
Comparing Quotes from Different Companies
When you receive multiple quotes, it’s essential not just to compare prices but also the value offered:
- Consider Experience: Companies with a longer track record may justify higher charges based on expertise and quality assurance.
- Customer Reviews: Look at reviews and testimonials to gauge the potential reliability and quality of service.
- Services Offered: Check if some companies include extras that may provide better value.
Best Practices for Budgeting Your Landscaping Project
Establishing a comprehensive budget for landscaping ensures your project remains financially manageable throughout its execution.
Setting Realistic Expectations
It’s crucial to have realistic expectations regarding what your budget can achieve:
- Do some basic research on average costs in your area to form a more comprehensive view.
- Allow some flexibility in your budget to accommodate unexpected expenses that may come up during the project.
Identifying Hidden Costs
Be mindful of potential hidden costs that can arise:
- Permitting Fees: Some landscaping projects, particularly large installations or alterations, may require permits.
- Design Fees: If you opt for professional landscape design, fees can add an additional layer to your budget.
- Maintenance Costs: After installation, consider ongoing maintenance such as fertilization, pest control, and seasonal adjustments.
Financing Options for Landscaping Projects
For larger projects, explore financing alternatives:
- Personal Loans: Many homeowners take out personal loans to fund significant landscaping work.
- Home Equity Loans: These can also provide funds based on the equity built in your home, often at lower interest rates.
Conclusion and Final Thoughts on Landscaping Pricing
In conclusion, understanding landscaping company pricing is crucial for homeowners looking to enhance their outdoor spaces. With a thorough grasp of what influences pricing, what services to expect, and solid budgeting practices, you can navigate your landscaping project more effectively. Here’s a recap of key insights:
Recap of Key Pricing Insights
Pricing in landscaping can vary widely, influenced by project complexity, geographic factors, seasonal demand, and material costs. Knowing these elements can help you wisely choose your service provider.
Future Trends in Landscaping Pricing
As sustainability becomes increasingly important, expect to see trends towards more eco-friendly landscape practices, which may also influence pricing strategies in the long term.
How to Choose the Right Landscaping Company for Your Needs
Choosing the right landscaping company should be based on a well-informed decision. Always vet potential contractors, consider client feedback, review portfolios, and ensure that their expertise aligns with your project goals.